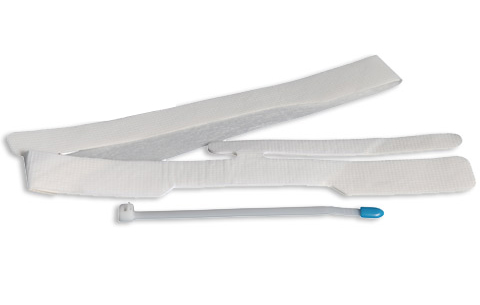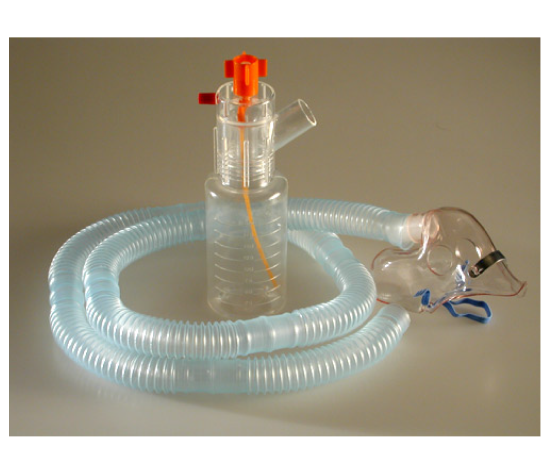
A Trach Collar is the standard way to deliver oxygen and humidified air to a patient breathing on their own through a tracheostomy. It sits directly over the tracheostomy opening, connected to an oxygen source and a humidifier, and it’s built to replace two jobs the nose and mouth normally handle together: delivering oxygen and keeping incoming air moist enough not to irritate the airway. Getting the setup right, flow rate, humidification, fit, and ongoing monitoring makes the difference between a patient who breathes comfortably and one whose airway starts working against them.
Why Tracheostomy Bypasses the Body’s Natural Air Warming System
Under normal breathing, the nose and mouth warm, filter, and humidify every breath before it reaches the lungs. A tracheostomy skips that entire process, since air enters directly through an opening in the neck rather than traveling through the upper airway first. Cold, dry air hitting the trachea directly can thicken secretions fast, and thickened secretions raise the risk of a blocked airway or a tube that stops functioning the way it should.
This is the core reason oxygen delivery for a tracheostomy patient calls for a different setup than a standard nasal cannula. The device has to do double duty: supply the prescribed oxygen level and replace the humidification that the upper airway used to provide automatically. Understanding this gap matters for anyone managing day-to-day care, and it connects directly back to What Is the Purpose of a Tracheostomy in an Ill Patient?, since the airway’s altered function is exactly what makes this extra step necessary in the first place.
Setting Up a Trach Collar for Oxygen and Humidified Airflow
A Trach Collar attaches over the tracheostomy tube opening and connects, through corrugated tubing, to a humidifier and an oxygen or air source. Before placing it on the patient, confirm the oxygen tubing is fully connected, the humidifier reservoir has adequate water, and airflow is actually reaching the collar. A quick way to check that last point: hold the collar close to your cheek and feel for airflow before placing it on the patient. If nothing’s coming through, check every connection point and the tubing itself for kinks or blockages before troubleshooting anything else.
Once flow is confirmed, position the Trach Collar over the tracheostomy opening and adjust the strap for a comfortable, stable fit that holds up through normal movement, coughing, and repositioning throughout the day.
Choosing the Right Flow Rate and Oxygen Concentration
Flow rate and oxygen concentration always come from a physician’s order. A general rule applied across every patient simply doesn’t hold up here, since the same order can require different flow settings depending on the delivery device and setup in use. Understanding how these settings interact still helps caregivers and clinical staff troubleshoot when something seems off. Getting the flow rate wrong, even with the “right” percentage dialed in, can mean the patient isn’t actually receiving the oxygen concentration the order calls for.
Two setups delivering the same labeled oxygen percentage can behave very differently depending on total flow, which is exactly why confirming the actual delivered oxygen matters as part of routine monitoring, checked regularly rather than assumed to stay accurate indefinitely.
Why Humidification Becomes Essential Once Flow Passes Four Liters Per Minute
Humidification becomes essential once oxygen flow through a tracheostomy exceeds roughly 4 liters per minute. Below that threshold, some setups can run without added humidity for very short periods, but any sustained oxygen delivery through a bypassed upper airway benefits from humidification at almost any flow rate, since dry air reaching the trachea directly causes problems faster than most caregivers expect.
Heated humidification, generally maintained between 30°C and 32°C and increased toward 35°C if secretions run thick, provides better moisture delivery than cool mist alone and helps prevent the crusting that leads to blocked or malfunctioning tubes. Confirming the humidifier is producing visible bubbling or mist should be part of every routine check on the setup, checked with the same regularity as flow rate and connections.
Securing the Trach Collar Without Compromising Tube Position
A Trach Collar delivers oxygen effectively only when it stays properly positioned, and that positioning depends heavily on how well the tracheostomy tube itself is secured underneath it. A loose or improperly fitted Tracheostomy Tube Holder can let the tube shift slightly, throwing off how well the collar seals against the opening and reducing how much of the prescribed oxygen actually reaches the patient.
Checking tube security alongside collar fit during routine care catches this early. A collar that keeps sliding out of position often traces back to a securement issue underneath it, worth ruling out before assuming the collar itself needs replacing.
Monitoring a Patient Beyond the Oxygen Saturation Number
Good monitoring looks past a single oxygen saturation reading on a pulse oximeter. Clinical staff and caregivers watch a patient on a Trach Collar track trends over time, paying attention to respiratory rate, breathing effort, and how secretions look and behave. A gradual increase in work of breathing, even with saturation numbers holding steady, can signal a developing problem well before the oxygen number itself drops.
Part of this ongoing check should include the securement setup itself. For guidance on selecting and fitting the right device for a given patient’s neck size and activity level, the Tracheostomy Tube Holders Complete Guide covers the securement side of care that directly supports everything discussed here.
Alternative Oxygen Delivery Methods for Mobility and Transport
A standard Trach Collar works well for most day-to-day care, but certain situations call for a different approach. Short trips, mobility sessions, or brief periods away from a full setup often use a heat-moisture exchange device, sometimes referred to as a trach nose, which provides basic heat and moisture without needing a full humidifier and tubing setup. High-flow oxygen therapy offers another option for patients with higher oxygen demands, connected through a proper tracheostomy mask or adapter, a detail that matters for safety since tubing shouldn’t attach directly to the tube itself.
Patients using a speaking valve introduce another layer of coordination, since the cuff typically needs to be deflated for a valve trial, and oxygen delivery has to be arranged around that setup. Can You Speak With a Tracheostomy? covers how these two goals, communication and oxygen delivery, fit together for patients working toward this stage of recovery.
When Oxygen Needs Signal a Bigger Change Is Coming
Oxygen requirements rarely stay static throughout a tracheostomy patient’s recovery. Needs may increase during an illness or decrease as a patient’s respiratory status improves, and either direction of change deserves attention from the care team rather than an automatic adjustment made without reassessment. A patient whose oxygen needs are climbing steadily, or whose secretions are changing in a way that’s harder to manage, may need more than a flow rate adjustment.
Tube condition itself factors into this picture too, since a tube that’s degraded or due for replacement can affect how well oxygen delivery and humidification actually perform. That connection between tube maintenance and oxygen delivery is worth understanding through How Often Should a Tracheostomy Tube Be Changed?, since one routinely affects the other over the course of ongoing care.
Frequently Asked Questions
Hold the collar close to your cheek and feel for airflow before placing it on the patient. If you don’t feel anything, check every connection point and the tubing itself for kinks or blockages.
Humidification generally becomes necessary once flow exceeds about 4 liters per minute, though sustained oxygen delivery through a tracheostomy benefits from humidification at almost any flow rate, since the upper airway’s natural humidifying function is bypassed entirely.
Start by checking the tube holder underneath it. A tie or strap that’s loosened or shifted lets the tube move slightly, and that small shift is often enough to throw off the collar’s fit even when the collar itself is perfectly fine.
Watch how the patient is actually breathing, not just what the monitor says. Respiratory rate, visible effort, and how thick or thin secretions look can all shift before the saturation number does, so catching those changes early gives the care team a head start.
Sometimes, depending on the equipment in use. The cuff usually needs to be deflated first, and getting the combination right takes coordination between respiratory therapy and speech-language pathology to confirm it works safely for that specific patient.